Direct answer: To set up a standing desk converter correctly, measure your standing elbow height, subtract your current desk height, and raise the converter to close that gap. Then adjust the keyboard tray so your elbows stay near 90-120° and position the monitor so its top sits at or slightly below eye level, in both the sitting and standing positions.
Key takeaways
- A converter adds lift on top of your existing desk, so the right height depends on your desk’s current height, not a single universal setting.
- Subtract your desk height from your standing elbow height to find the riser lift you actually need, then check that number against the converter’s published lift range.
- Keep elbows at 90° or more and the monitor’s top at or slightly below eye level, in both sitting and standing positions.
- If the gap between your elbow height and your desk height is bigger than any converter’s lift range, a monitor arm, a desk riser block, or a different setup may be the real fix.
- Most ongoing complaints trace back to one of three things: not enough lift, a keyboard tray at the wrong angle, or no floor support for long standing sessions.
Why Is Setting Up a Converter Different From Setting Up a Full Standing Desk?
A full height-adjustable desk moves the entire work surface, including the desk itself, through its whole range. A converter sits on top of a desk that is already a fixed height, then lifts only the platform above it. That means your setup target is not “what height should my desk be,” it is “how much extra lift do I need to add to the desk I already have.”
Most general standing-desk guides skip this distinction because they assume you are buying one height-adjustable surface. With a converter, the desk height is a fixed starting point you cannot change, and the only variable you control is how far the converter raises the platform above it.

How Do You Calculate the Riser Lift You Actually Need?
There is no single published formula for this from OSHA or Cornell — both organizations publish elbow-angle and eye-level targets, not a converter-specific lift calculation. The method below is a derived worksheet built from their general ergonomic principles, not a formula quoted from either source. Measure, then do the subtraction yourself:
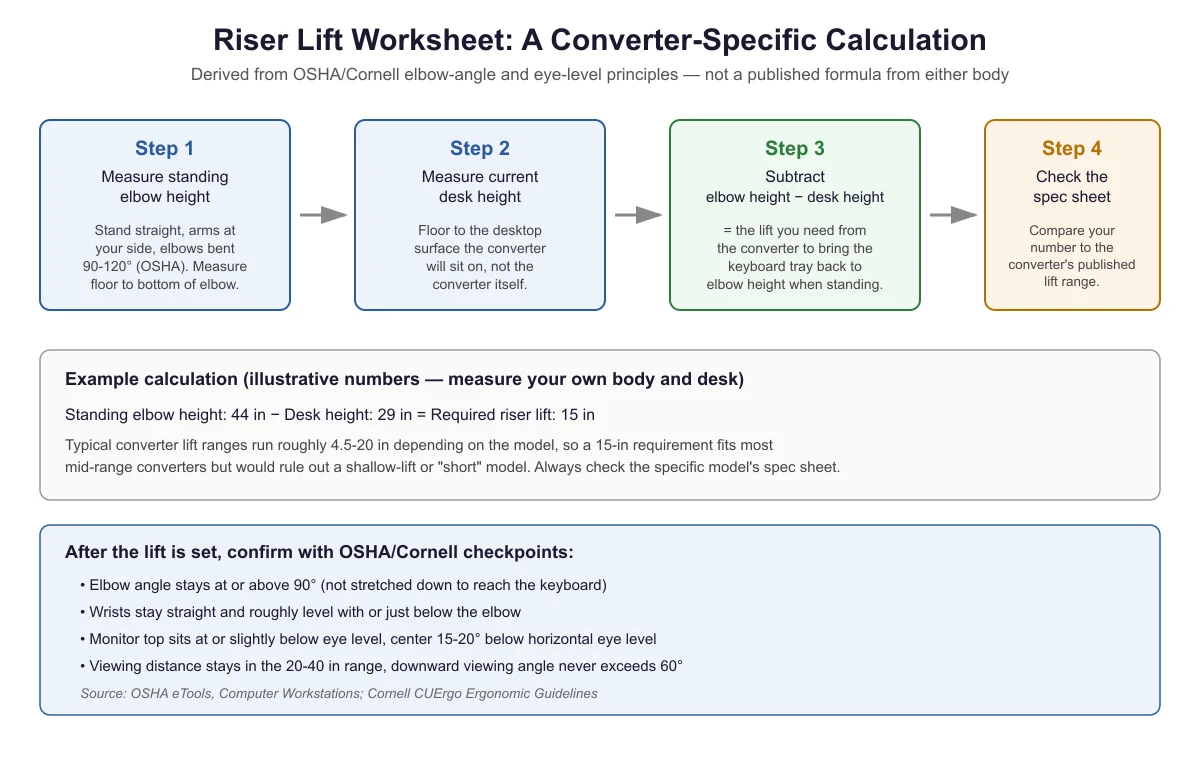
- Measure your standing elbow height. Stand straight with your arms relaxed at your sides and your elbows bent between 90° and 120°, which is the range OSHA’s eTools recommend for keyboard work. Measure from the floor to the bottom of your elbow.
- Measure your current desk height. Measure from the floor to the desktop surface the converter will sit on, not the converter itself.
- Subtract. Standing elbow height minus desk height equals the riser lift you need so your hands land back at elbow height when you stand.
- Check the spec sheet. Compare that number to the specific converter’s published lift range before you buy it or before you assume your current one is “too short.” Typical converters span roughly 4.5 to 20 inches of lift depending on the model, with some tall-user models reaching close to 21 inches, so the range you need has to be checked against one specific product, not a general figure.
Example: if your standing elbow height is 44 inches and your desk is 29 inches tall, you need about 15 inches of lift. That fits most mid-range converters but would rule out a shallow-lift model built mainly for laptop use. If the math says you need more lift than any converter on the market offers at your desk height, the fix is a different desk height, not a stronger converter — see the troubleshooting section below.
How Should the Keyboard Tray and Monitor Be Positioned Once the Lift Is Set?
Getting the lift number right is step one. The tray and monitor still need their own check, because a converter that raises to the right overall height can still leave the keyboard or screen in the wrong place relative to your body.
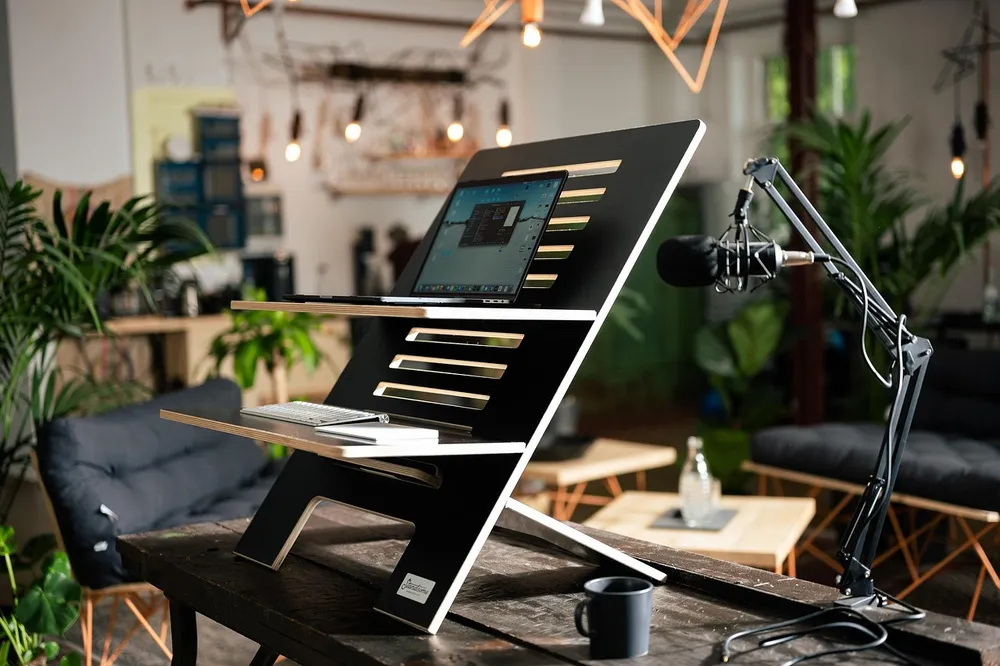
- Keyboard tray: Cornell’s ergonomics guidelines and OSHA’s eTools both center on the same target — wrists straight and roughly level with the elbow, elbow angle at 90° or slightly more, elbows close to the body rather than stretched forward.
- Monitor height: OSHA’s eTools recommend the top of the monitor at or slightly below eye level, with the center of the screen 15-20° below horizontal eye level.
- Viewing distance: Keep the screen 20-40 inches from your eyes, and never let the downward viewing angle exceed 60°.
- Cornell’s practical check: Sit back in your chair at a slight recline (about 100-110°), hold your arm out horizontally, and your middle finger should almost touch the center of the screen. Repeat the same check standing.
Do this check in both positions, sitting and standing, since a converter’s whole purpose is switching between the two. A tray height that works seated can be wrong once the platform is raised.
How Do You Check Stability and Clearance Before You Start Working?
| Step | What to check | Target |
|---|---|---|
| 1. Elbow angle | Angle between upper arm and forearm while typing | 90° or more (OSHA, Cornell) |
| 2. Wrist position | Wrist angle relative to keyboard | Straight, level with or just below elbow |
| 3. Monitor height | Top of screen relative to your eyes | At or slightly below eye level |
| 4. Monitor distance | Eye to screen distance | 20-40 inches |
| 5. Downward viewing angle | Angle looking down at the screen | Never more than 60° |
| 6. Platform stability | Gently press down on the front edge at standing height | No rocking, lifting, or sliding of the base |
Cables are the other thing to check before you start: give the converter’s full range of travel a dry run with nothing plugged in, then route cords with enough slack that they cannot snag or restrict the platform as it moves. That is a safety check, not a cable-management project.
What Should You Check If Something Still Feels Off?
If you have done the lift calculation and the position checks above and something still feels wrong, the cause is almost always one of a short list of converter-specific issues. Each one has its own full walkthrough:
- Still too low even at maximum lift? See why a standing desk converter feels too low, and how to fix it.
- Wrists or forearms uncomfortable on the tray itself? See how to fix a keyboard tray that sits too low or too high.
- Screen too high after adding an arm? See whether a monitor arm is compatible with your converter.
- Legs or feet tired after an hour standing? See whether you need an anti-fatigue mat with a converter.
- Not sure how often to switch positions? See the sit-stand ratio guide for converter users.
- Not sure how many total hours to stand per day? See how many hours a day you should stand with a converter.
- Sore after the first week of use? See how to transition to a converter without pain.
- Worried the clamp or feet are marking your desk? See whether a converter can damage your desk, and how to prevent it.
- Not sure if a habit you have picked up is a problem? See common standing desk converter posture mistakes.
Frequently Asked Questions
Do I need to buy a new desk to use a standing desk converter?
No. A converter is designed to sit on top of a desk you already own and add height-adjustable lift above it. The trade-off is that your existing desk’s height becomes a fixed input to the lift calculation above, rather than something you can also adjust.
How do I know if my converter has enough lift for me?
Run the subtraction in this article: standing elbow height minus your desk height. Compare that number to the specific converter’s published maximum lift, not a general range, since lift ranges vary by model from roughly 4.5 inches up to about 20 inches.
Can I use a standing desk converter on any desk?
Mostly, but the desk’s starting height and edge thickness matter. A very tall desk may leave you short of elbow height even at maximum lift, and clamp-style converters need a specific edge thickness to grip, which is a mechanical fit question separate from the lift math.
How long does it take to get used to a new converter height?
This article focuses on the setup math rather than the adjustment period. For a week-by-week ramp-up plan and what to check if you feel sore in the first weeks, see transitioning to a standing desk converter without pain.
Does the keyboard tray need to be at a different height than the main platform?
Often yes, since the tray is meant to sit at typing height while the main platform holds the monitor higher. If the tray height feels wrong even after the main lift calculation checks out, see the dedicated keyboard tray fix guide.
Sources
- OSHA eTools — Computer Workstations: Positions (elbow angle, neutral posture)
- OSHA eTools — Computer Workstations: Monitors (viewing distance, eye level, viewing angle)
- Cornell University Ergonomics Web (CUErgo) — Ergonomic Guidelines (elbow angle, monitor eye-level positioning method)
standingdeskconverters.com Editorial Team. Last updated: November 13, 2026.


3 thoughts on “How to Set Up a Standing Desk Converter Correctly”